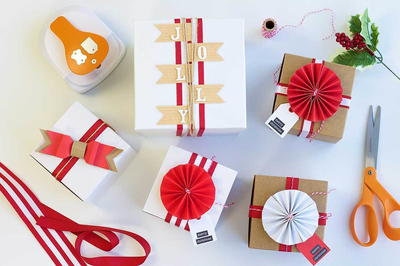
Homemade Christmas Present Toppers

Looking for ways to make your Christmas presents stand out this year? These homemade Christmas present toppers will add creativity and fun to all of your gifts this year. These DIY gift toppers can easily be added to any gift and only take minutes to create. With three toppers to choose from, you can vary your extra decoration to show your gift-wrapping range. Your family and friends will love these homemade gift toppers on their presents this year and might just save them for a re-gift of their own.
Estimated CostUnder $10
Time to CompleteUnder an hour
Primary TechniquePaper Crafts

SeasonWinter
HolidayChristmas
Project TypeMake a Project
Materials List
- Gift boxes
- Ribbon
- Twine
- Wood veneer
- Alpha Stickers
- Cardstock
- Adhesive
- The Original Orange-handled Scissors™ (8")
- Label/Simple Double Tag Maker with Built-in Eyelet Setter (1.3" x 1.8")
- Banner/Artisan Double Tag Maker with Built-in Eyelet Setter (1.3" x 1.8")
- Deluxe Paper Trimmer with Aluminum Cut Rail (12")
- Banner Thick Materials Shape Punch (Large)
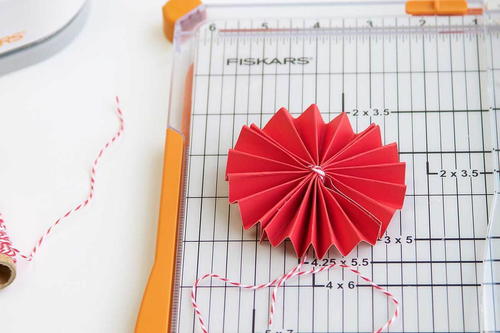
To Make The Rosette Gift Toppers:
-
Use the Deluxe paper Trimmer with Aluminum Cut Rail to cut two pieces of cardstock to 3” x 6”. Fold each strip – accordion style - and then fold in half to form a fan. This portable paper trimmer features a sturdy aluminum cut rail that helps prevent wobbly or curved cuts.
-
Adhere the two pieces together to create a rosette, and secure at the center with twine.
-
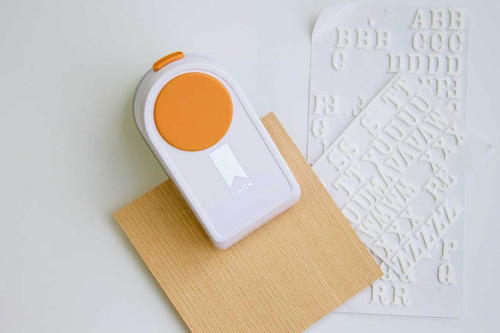
Cut a simple label from your favorite Tag Maker punch. After you punch the tag, you can conveniently punch the hang hole and set the eyelet using the tag hole punch at the front of the tool and the peg located on the back of the punch.
-
Glue the rosette to the top of the gift box and attach the simple label with twine.


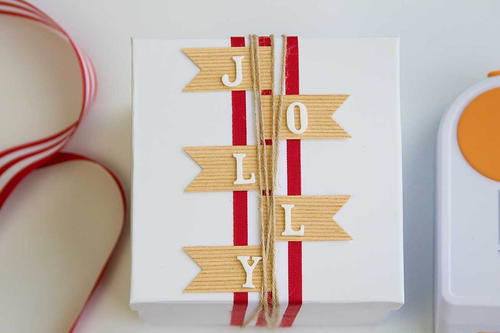
To Make The Wooden Banner Gift Topper:
-
Use the Thick Materials Punch to cut banner pieces from wood veneer. The punch will have no problem getting through this wood because it was designed specifically to easily cut through a variety of thick craft materials.
-
Tie a thick piece of ribbon around your gift box, and adhere the wooden banner pieces to the top. Apply alpha stickers to the banner pieces to spell a festive word or the gift recipient’s name. Wrap twine around the ribbon and banner to complete.
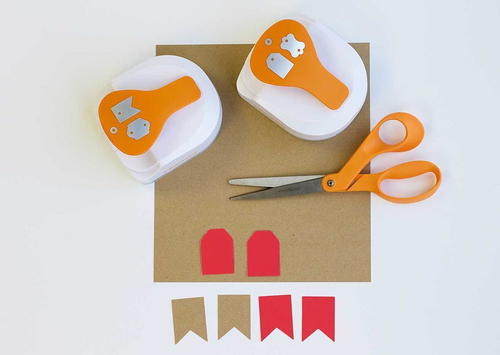
To Make The Bow Gift Topper:
-
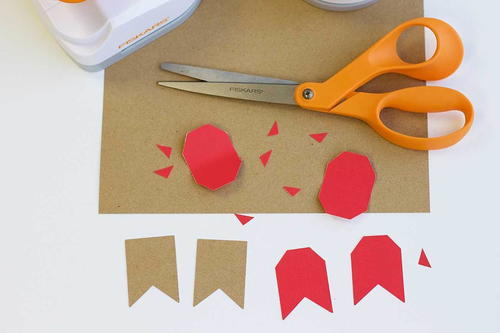
Cut two simple labels using the Label/Simple Double Tag Maker and four banners using the Banner/Artisan Double Tag Maker.
-
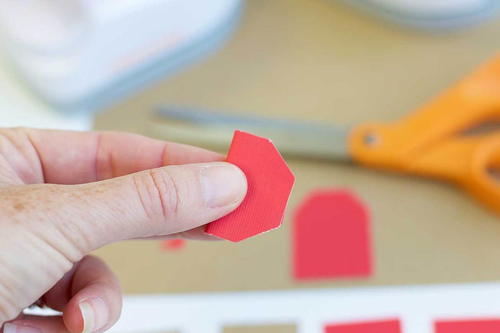
Gently roll the two simple labels in half, avoiding putting a crease in the bend of the cardstock. Use The Original Orange-Handled Scissors™ to trim the flat end to match the angled end. This pair of classic and versatile scissors is great for any project around the house.
-
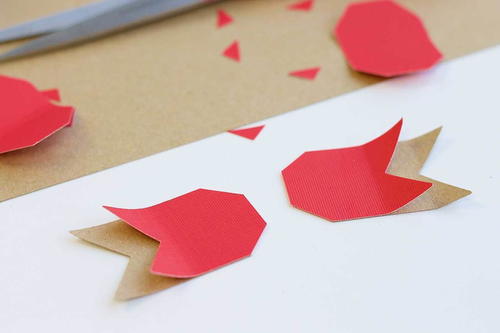
Align the simple label on top of two of the banner labels, and trim the flat end of the banners to match the angle of the simple label.
-
Adhere the trimmed banner shapes to the untrimmed banner shapes. Check that the untrimmed banners extend beyond the end of the trimmed banners. Curl up the points.
-
Adhere the two ends of simple labels together and glue to the banner pieces to create the bow loops.
-
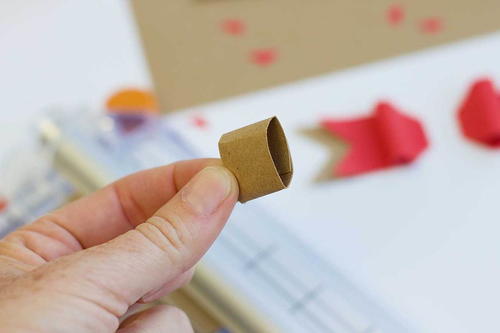
Use the paper trimmer again to cut a small piece of cardstock for the bow center. Gently roll in half and adhere.
-
Adhere the sections of the bow together and attach to the top of a gift box.

Read NextNo Mess Decorative Pumpkins