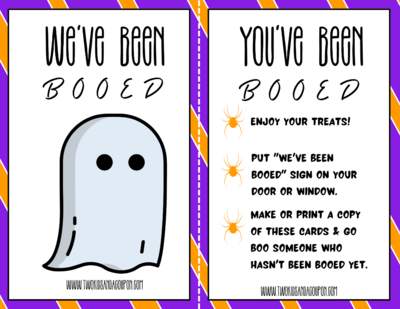
DIY Halloween Treat Bags

Get into the spooky spirit with these DIY Halloween treat bags. Create your own goody bags to pass out to the trick-or-treaters this year. These treat bags are perfect for kids who will love the themed designs and will cherish the treats inside. These easy Halloween treat bags are great for Halloween parties, school classes, and trick-or-treaters. Every child will want one of your ghostly treats! Try these treat bags this Halloween and watch the delighted faces of the children in your life as they enjoy their handmade goody bags.
Estimated CostUnder $10
Time to CompleteIn an evening
Primary TechniquePaper Crafts

SeasonFall
HolidayHalloween
Age GroupToddlers, Preschool & Kindergarten, Elementary School
Project TypeMake a Project
Materials List
- Letter size card stock (black, and vellum)
- White printer paper
- White Paint Marker
- Black permanent marker
- Double sided tape
- Glue stick
- Washi tape
- ProCision™ Rotary Bypass Trimmer (12")
- The Original Orange-handled Scissors™ (8")
- Blunt-tip Kids Scissors (5")
- Banner Squeeze Punch (Large)
Instructions:
-
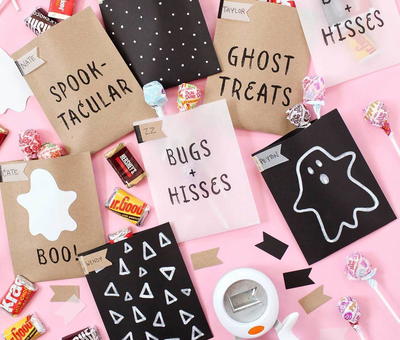
Using the printable template, print your favorite Halloween phrases onto 8.5” x 11” sheets of cardstock, kraft or vellum paper. You will be able to make two Halloween treat bags per sheet of card stock.
-
Use the SureCut™ Deluxe Paper Trimmer to cut each sheet of printed paper in half along the long edge, giving you two pieces of 4.25” x 11” paper. The trimmer will ensure clean cuts and crisp lines, making the bags easier to fold. Fold the resulting piece of paper in half and use double sided tape to press the two long sides of the paper together, creating a 4.25” x 5.5” treat bag.
-
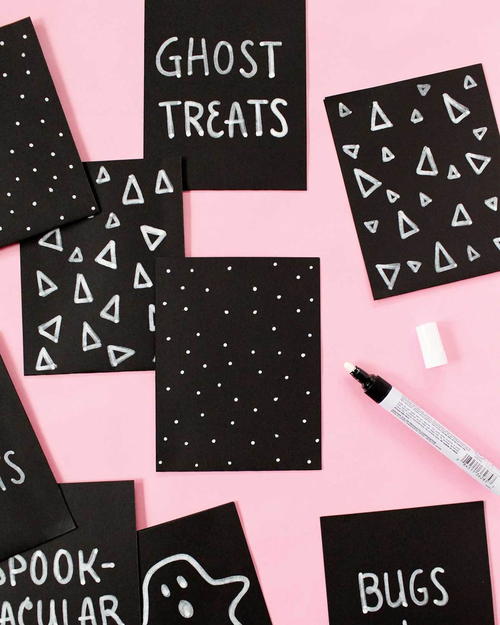
Using a white paint marker, decorate the black paper treat bags. You can draw a little ghost, write out some favorite Halloween one-liners, or make some fun polka dot and triangle patterns on the bags.
-
Print the ghost template on a piece of white printer paper. Cut out each ghost shape using your Orange-Handled™ Scissors. Kids can help with this step by using the Blunt-Tip Kids Scissors. Using a glue stick, apply a ghost to the Boo! treat bags.
-
Use a Banner Squeeze Punch to create banner shapes from the card stock. Write the name of each recipient on a banner and secure to a different color treat bag with a piece of Washi tape.
-
Fill each treat bag with some fun Halloween treats and give them out to friends and family.


Read NextEggnog Holiday Fudge Recipe
Your Recently Viewed Projects
Thanks for your comment. Don't forget to share!
flowergirl
Aug 10, 2018
How adorable are these treat bags. This is perfect for a kid's Halloween party. You can make these while your kids help you with sticking the banner onto the bags. They look so cute and professionally done, nobody will believe they are homemade. You can make as many designs as you want, I would probably use some glow into the dark ones, print your favourite monsters on the bags or spooky animals like spiders and bats.
Report Inappropriate Comment
Are you sure you would like to report this comment? It will be flagged for our moderators to take action.
Thank you for taking the time to improve the content on our site.