11 Car Repairs You Can Do Yourself
Save a trip to the mechanic with these DIY car maintenance tips!

You don't have to be a mechanic to repair your own car. These 11 car repairs you can do yourself will save you time and money that you'd likely spend at the mechanic for minimal repairs.
All of these life hacks will save you money, upwards of over $400, and you likely already have the tools to complete them at home. From beginner-level repairs like changing your own oil to more complex fixes like flushing your radiator, these DIY car maintenance ideas will teach you to be handier instead of handing over your hard-earned cash.
You won't have to pay for extreme labor costs again once you know how to perform your own vehicle maintenance. You'll find average costs to repair these items at home as well as what the average mechanic will charge to see the potential savings. The next time your car requires routine maintenance, determine if you can repair it on your own in order to save money and learn a valuable skill.
1. Replace Brake Pads
Tools Required: Owner's Manual, Floor Jack, Jack Stands, Brake Tool, Brake Grease, Socket Wrench, Tire Iron
Your Price: $100
Mechanic's Price: $500
Savings: $400
- Lift Your Car. Loosen the lug nuts on a pair of tires (either front or back) before jacking your car up according to your car's jack points, referencing the owner's manual if needed. Place the jack stands under a structural point in your vehicle's frame and let your car rest on them. Remove the tires of the wheels on which you'll be working.
- Remove the Old Brake Pads. Using your socket wrench, remove the bolts from the caliper assembly and slide the caliper assembly off the rotor. The caliper assembly will still be connected to the brake line so be careful when moving; place the caliper assembly on top of the rotor, verifying that it is well supported. Now you can remove the old brake pads by sliding or popping them out, noting how they were oriented.
- Replace the Brake Pads. Apply the brake grease to the backs of your new brake pads; avoid getting brake grease on the rotor or front of the brake pads as this may harm your brakes. Once greased, you are ready to insert your new brake pads in the same way your old ones were positioned.
- Reassemble Your Car. Reposition your caliber assembly in its proper home. Note that it may need to be adjusted to fit your new pads which you can do with the brake tool. Reattach your tires, re-insert the jack, remove the jack stands, and lower your car. Make sure to re-tighten the lug nuts when your car is back on the ground.
2. Replace Battery
Tools Required: Owner's Manual, Socket Wrench, Gloves
Your Price: $75
Mechanic's Price: $125
Savings: $50
- Remove Your Old Battery. Find your battery's location, use your owner's manual if it's not easily identifiable. Identify the positive and negative ports for your battery. Using your wrench, loosen the bolt that holds the negative terminal. Once loosened, detach the negative cable from the battery. Repeat with the positive cable. Remove the clamp or restraint holding your battery in place and lift the old battery out of your car.
- Install the New Battery. Clean the battery connectors with a mixture of water and baking soda; dry completely. Insert the new battery aligning the positive port with the positive cable and negative with negative. Secure the new battery with the clamps and restraints. Attach the positive cable first and tighten then repeat with the negative cable.
- Recycle Your Old Battery. Take your old battery to your local auto parts store for recycling. Learn more about battery recycling here.
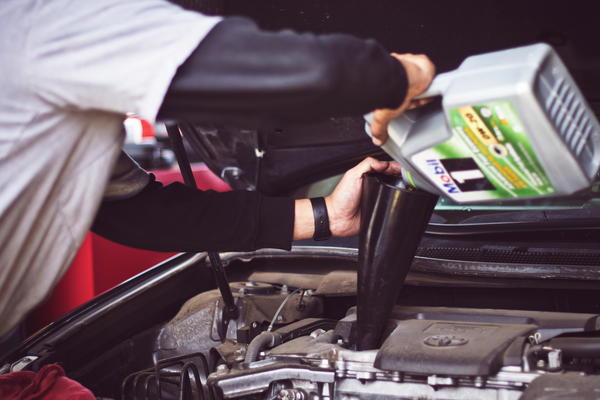
3. Change the Oil
Tools Required: Owner's Manual, Oil Pan, Box-End Wrench, Oil Filter Wrench, Jack, Jack Stand, Funnel
Your Price: $30
Mechanic's Price: $100
Savings: $70
- Lift Your Car. Jack your car up according to your car's jack points, referencing the owner's manual if needed. Place the jack stands under a structural point in your vehicle's frame and let your car rest on them.
- Drain the Old Oil. Use your box-end wrench to loosen the oil plug; the oil will start draining quickly, so be ready to position the drain pan under the oil stream. Let all of the oil drain before continuing.
- Remove the Old Oil Filter. Use your filter wrench to remove the old filter and let any excess oil drain into the oil pan.
- Install New Oil Filter. Use new oil to coat the gasket of the new oil filter before attaching. Spin the new filter on then tighten by hand.
- Add New Oil. Refill the reservoir with oil, checking your dipstick to ensure you are in the proper oil range.
- Recycle Old Oil. Take your old oil to your local auto parts store for recycling.
4. Replace Spark Plugs
Tools Required: Owner's Manual, Socket Wrench, Extension Bar, Spark Gap Gauge
Your Price: $40
Mechanic's Price: $100
Savings: $60
- Remove Your Old Spark Plugs. Locate the spark plugs in your car, referring to the owner's manual if needed. Pull the wire plug from the engine to expose the spark plug. Fit your extension bar onto the spark plug and use your socket wrench to slowly and carefully remove the first spark plug.
- Check the Spark Plug. Use your spark gap gauge to measure the firing distance of the spark plug. Check the distance against your vehicle specifications to see if changing the spark plugs is necessary.
- Insert New Spark Plugs. If your spark plugs need replacing, buy the correct replacements according to your owner's manual. Change them one at a time using the extension bar to insert and tighten them before re-covering with the wire plug.
5. Replace Headlight Bulbs
Tools Required: Owner's Manual, Socket Wrench, Alcohol Wipes, Tissues, Socket Wrench
Your Price: $20
Mechanic's Price: $50
Savings: $30
- Remove Your Old Bulbs. Follow your owner's manual's instructions for removing headlight bulbs; some pop out while others require you to remove parts of the fender to access the bulb. Generally, you will need to unplug the power connector and remove the dust cover before wiggling out the bulb.
- Clean Your New Headlight. Use a tissue to grab the new bulb as the oils from your hands can damage it. To guarantee your new light is free of dust and fingerprints, gently wipe it with an alcohol wipe.
- Insert New Bulbs. Secure the new bulb into the headlight. Then reattach the dust cover and power connector. Turn on your car and test out the new bulbs to make sure they work.
6. Replace Windshield Wipers
Tools Required: None
Your Price: $20
Mechanic's Price: $40
Savings: $20
- Remove Old Windshield Wipers. Most windshield wipers have a small plastic clip that you can pop off that will allow you to slide the old wiper from the metal piece on your car.
- Attach New Windshield Wipers. Follow the directions on the back of the package. Most new wipers will snap in place using a plastic clip that attaches to the metal arm on your car.

7. Replace Air Filter
Tools Required: Owner's Manual
Your Price: $10
Mechanic's Price: $25
Savings: $15
- Remove Old Air Filter. Find the airbox under the hood of your car, referencing your owner's manual as needed. Open the airbox to expose the old air filter. Pop it out of the airbox.
- Insert New Air Filter. Insert your new air filter into the airbox. Close and re-clamp the airbox.
8. Flush Radiator System
Tools Required: Owner's Manual, Drain Pan, Jack, Jack Stands, Funnel, Socket Wrench
Your Price: $20
Mechanic's Price: $125
Savings: $105
- Remove the Pressure Cap and Drain Plug. Locate the radiator pressure cap under the hood using your owner's manual and twist it off. Position your drain pan under the drain plug and use your socket wrench to remove it completely.
- Drain the Radiator. Let your radiator drain completely and reseal the drain plug.
- Clean the Radiator. Pour radiator cleaner and distilled water as instructed on the radiator cleaner into the radiator and return the pressure cap. Turn your car on with the heat on full blast for 5 minutes to work the cleaner through the radiator. Turn off your car and let it cool for 15 minutes before draining radiator again.
- Flush the System. Repeat the cleaning step using one gallon of tap water instead of cleaner. Repeat this process until the drainage runs clear.
- Refill the Radiator. Fill the radiator system with a 50/50 mixture of antifreeze and distilled water. Run your car for 15 minutes to have the solution pull through the entire system. Top off the radiator until you reach the "Full" line.
9. Replace Fuel Filter
Tools Required: Owner's Manual, Oil Pan, Box-End Wrench, Oil Filter Wrench, Jack, Jack Stand, Pliers
Your Price: $40
Mechanic's Price: $120
Savings: $80
- Remove the Fuel Pump Fuse. Locate your vehicle's fuse box using your owner's manual. Use the diagram in the fuse box to identify the fuel pump fuse. Use needle-nose pliers to remove the fuse.
- Start the Engine. With your vehicle in park and the parking brake engaged, turn on your car and let it run for one minute. This will help relieve pressure in your fuel lines.
- Replace the Fuel Pump Fuse. After you turn your vehicle off, you can re-insert the fuel pump fuse in the fuse box.
- Prepare to Remove Your Old Fuel Filter. Disconnect your battery to ensure the car does not start while working on the fuel pump. Use your owner's manual to locate the fuel pump. Jack up the car if necessary and position the drip pan underneath the fuel filter.
- Remove Your Old Fuel Filter. Remove the plastic clips holding the fuel filter in place. Remove the fuel lines from the filter, making sure to aim them towards the drip pan. Slide the fuel filter out of the bracket.
- Install New Fuel Filter. Compare the old and new fuel filter to make sure they are the same. Slide the new filter into the bracket. Fasten the fuel filter to the fuel lines and secure it with the plastic clips. Lower your vehicle if jacked.
10. Rotate Your Tires
Tools Required: Owner's Manual, Jack, Jack Stands, Tire Iron
Your Price: FREE
Mechanic's Price: $40
Savings: $40
- Lift Your Car. Loosen the lug nuts on all four tires before beginning to lift your car. Use your jack to lift the car and place jack stands in a way to support the entire frame of your car.
- Remove Your Tires. Loosen the lug nuts completely and remove all four tires from the car.
- Rotate Your Tires. Depending on your car, you can rotate the tires in different patterns to encourage even wear. You can always rotate the same side front to back, no matter the drivetrain. For front-wheel drive vehicles, it's best to move the front tires to the rear of the same side and to move the rear tires to the front of the opposite side in an "X" pattern. For rear-wheel and 4-wheel drive, it's best to move the rear tires to the front of the same side and to move the front tires to the rear of the opposite side.
- Lower Your Vehicle. Once you've rotated your tires, tighten the lug nuts and jack your vehicle again. Remove the jack stands before lowering your vehicle to the ground.

11. Fix Paint Scratches
Tools Required: Owner's Manual, Drain Pan, Jack, Jack Stands, Funnel,
Your Price: $10
Mechanic's Price: $150
Savings: $140
- Identify Scratches. Determine how deep the scratches are on your vehicle. The deeper the scratch, the harder it will be to fix.
- Clean the Surface. Clean and dry the surface of the scratch completely to remove any debris from the area.
- Fill the Scratch. You can use a variety of products to fill in scratches depending on the depth of the scratch. Shallow scratches can often be filled with toothpaste or fingernail polish while deeper scratches usually require a scratch removal kit. Apply whichever product to a small microfiber pad and work into the scratch for a few minutes.
- Reapply As Needed. After applying the material, use a clean microfiber cloth to clean any residue from the area. If the scratch persists, wash and dry the area and repeat application until the scratch is no longer visible.
What other car repairs do you complete at home? Let us know in the comments!

