Upcycled Headboard Idea

Updating your bedroom furniture can be as easy as changing your headboard. This DIY fabric headboard turns your old, wooden headboard into a new padded headrest. Your bedroom will look brand new, and you'll save yourself the cost of new bedroom furniture. This headboard project upcycles your current headboard into a modern, fabric backing that adds comfort and style to your room. You will save money remodeling your room, creating a DIY project that's easy on the eyes and your wallet; you'll never have a better night's sleep.
Estimated Cost$21-$30
Time to CompleteIn an evening
Primary TechniqueRepurposing

Project TypeMake a Project
Materials List
- Wooden bed frame with headboard
- Foam
- Batting
- Adhesive
- Upholstery fabric
- Heavy-duty stapler and staples
- Paint
- Saw
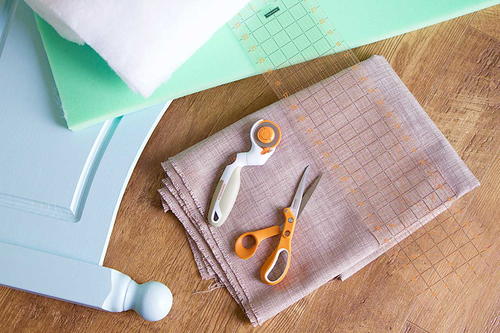
- Amplify® RazorEdge™ Fabric Shears (8")
- Adjustable Three-Position Rotary Cutter (45 mm)
- Acrylic Ruler (6" x 24")
Instructions:
-
Start by giving an old wooden bed frame a fresh coat of paint.
-
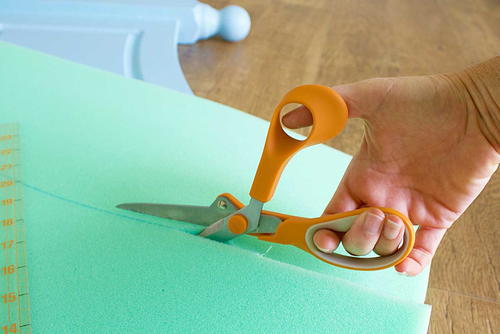
Measure the height and width of the headboard and record the measurements. Use Amplify® Shears (8") to trim the foam to the same size as the headboard. The shears are designed to make quick work of thick materials.
-
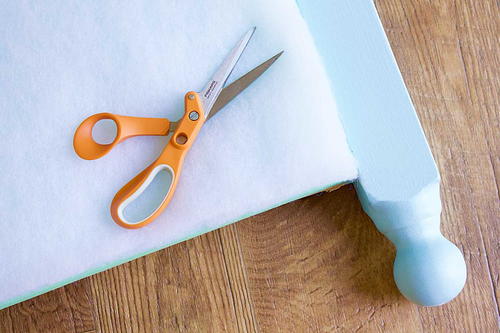
Cut the batting to the same size as the foam and adhere the batting to the top side of the foam. The batting will provide an extra layer of comfort and ensure that your upcycled headboard feels as good as it looks.
-
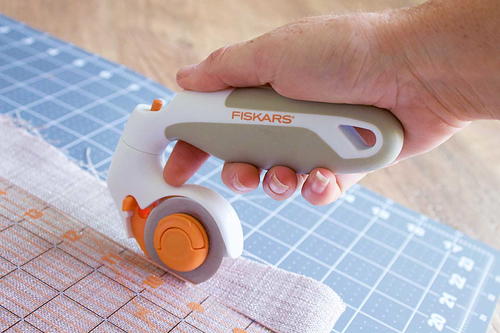
Use the Adjustable Three-Position Rotary Cutter and the Acrylic Ruler to trim the upholstery fabric to size. The fabric should be cut about 8 inches longer and wider than the foam. Using the rotary cutter in the power position will facilitate easier cutting of heavy-weight fabrics.
-
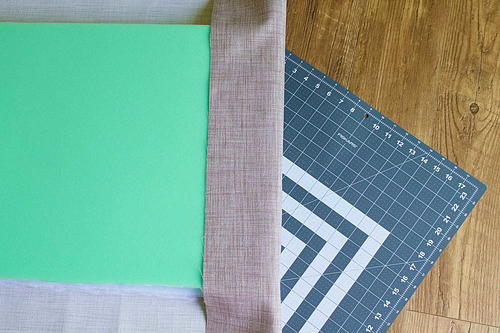
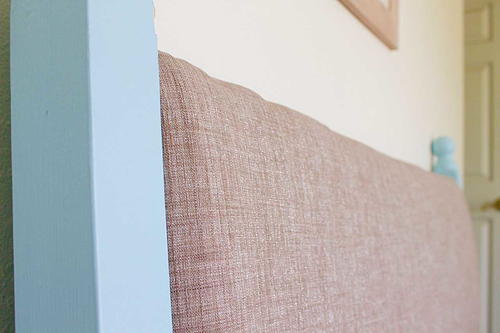
Place the fabric on your work surface with the wrong side of the fabric facing up. Put the foam in the center of the fabric, with the batting side against the fabric. Wrap the two short ends of the fabric around the foam. Glue in place and allow the glue to dry so the fabric doesn't move when working on the next step.
-
Place the fabric and foam on the front of the wooden headboard and pull the excess fabric from the long sides over the back to finish wrapping the headboard. Smooth out any wrinkles before stapling in place using a heavy-duty stapler. Once the fabric has been stapled at the top and bottom and the fabric is secure, you're done.
NotesIf the headboard is not already square, use a saw to trim away any curved sides and create a straight edge. This will make wrapping the fabric smoother and easier.
Read NextEasy $9 DIY Side Table