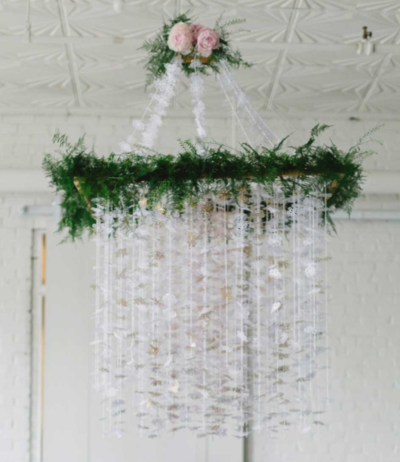
DIY Paper Chandelier

This DIY paper chandelier will have all your guests asking you how you made such an intricate craft. This paper punch chandelier will only take a few hours but looks like it took many days of hard work. This paper chandelier craft can be used as a DIY decoration for a wedding, bridal shower, or garden party. The best part of this craft is how thrifty you can be by making it; you can re-purpose many of the required materials for a low-cost decoration. Try this hanging paper craft at your next get-together!
Estimated CostUnder $10
Time to CompleteIn an evening
Primary TechniquePaper Crafts

Project TypeMake a Project
Materials List
- Cotton string
- Large sewing needle
- Fishing line
- Paper
- Spray paint
- Face mask
- Wood for frame
- Wire
- Foraged greenery and flowers (optional)
- Floral Frenzy Intricate Shape Punch (2")
- Neutron Dance Intricate Shape Punch (2")
- Petals On Point Intricate Shape Punch (2")
- Mum's the Word Intricate Shape Punch (2")
- Daisy Mae Intricate Shape Punch (2")
- The Original Orange-handled Scissors™ (8")
Instructions:
-
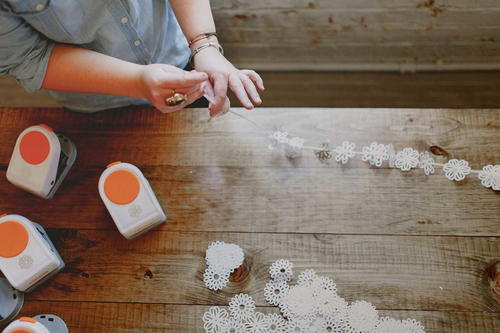
Punch through white printer paper with intricate shape floral punches. Punch until you have plenty. The intricate shape punches make it easy to create large, intricate punched-out designs that give paper projects depth with delicate laser-like cuts. The punch design requires less effort per punch and it reduc-es paper jams for speedier results. We especially love the perforated cuts in the center. The intricate pa-per punches with a smaller center hole are perfect for stringing this chandelier together.
-
Using a large needle and cotton yarn/string thread paper punch outs onto string until you get the de-sired spacing and length of strand. Range from 20-30 flowers per 4 ft. strand.
-
Spray paint pre-strung strands in a well ventilated area. You can mix two different colors of spray paint. You could also spray paint, paint, or dye your paper material prior to cutting. However, painting afterwards is an easy way to achieve a subtle ombre from white to pale pink and gold.
-
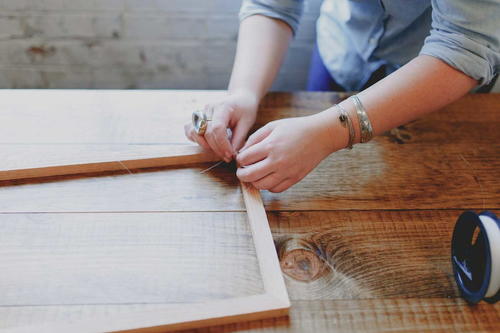
The frame of the chandelier is made out of cedar garden stakes. The natural color and roughness of this wood gives the chandelier a rustic feel. You could also use any found object, from thrifted frames, embroidery hoops, or bicycle wheels, the possibilities are endless!
-
Create a grid pattern of fishing line on your wooden frame. The grid will create squares, allowing you to hang strands throughout the whole frame.
-
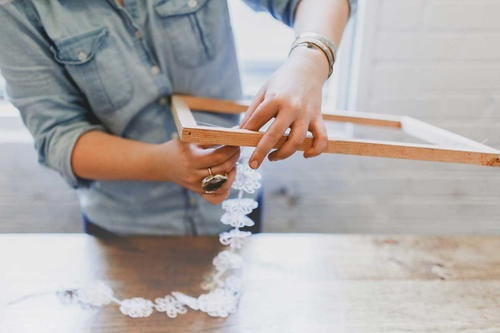
After securing fishing line with knots, begin tying on the pre-made strands. For a 2’x3’ large rectan-gular frame, you will need approximately 150 4’ strands.
-
Hang the chandelier with fishing line.
-
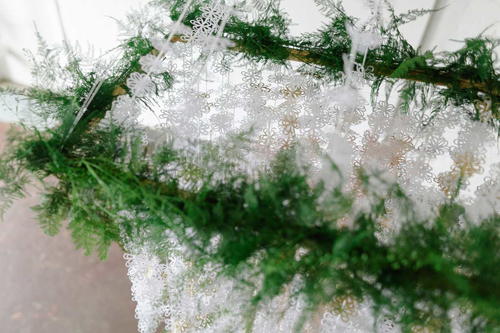
Adorn the chandelier with foraged greenery for a rustic look or leave alone for a more modern take. Use wire to attach the foraged ferns and blush peonies.


Read NextRustic Twig Monogram