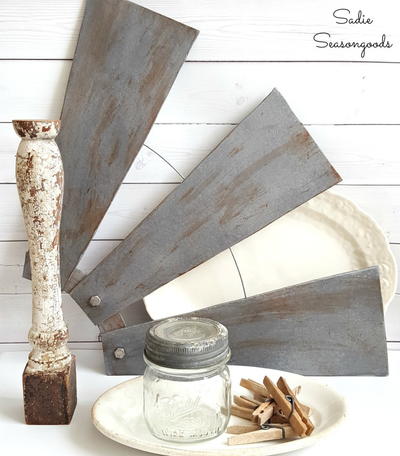
DIY Wall Wine Rack

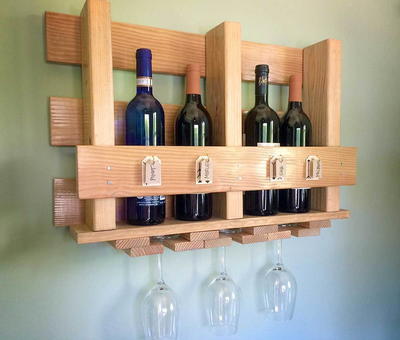
This DIY wine rack will put your wine collection on display and keep your wine and wine glasses handy at all times. This project is ideal for wine lovers who want to have a practical piece of decor that makes entertaining easy. This homemade wall-mounted wine rack keeps your wine accessories accessible, so you can pop open a bottle and enjoy with friends. When you aren't enjoying the wine, the rack also serves as a piece of wall decor. This wine rack shows off your love of wine at all times.
Estimated Cost$21-$30
Time to CompleteIn an evening
Primary TechniqueWood Crafts

Project TypeMake a Project
Materials List
- 3 pre-cut 1x4 boards at 26”
- 2 pre-cut 1x4 boards at 24”
- 3 pre-cut 2x4 boards at 15”
- 10 pre-cut 1x3 boards at 4 ½”
- 2” nails
- 1 ¼” nails
- Gray wood stain & stain brush
- Marker
- Cardboard
- Stick-on wood veneer
- Small hooks
- IsoCore™ 22 oz Framing Hammer (16")
- Native Arrows Decorative Stencil Set
- Tag Thick Materials Shape Punch (Large)
- Tag Thick Materials Shape Punch (Medium)
Instructions:
-
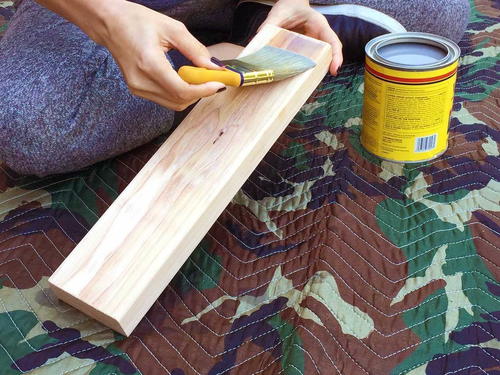
To keep it simple, the wood pieces for this project can be cut at the hardware store for a nominal fee. This is a smart and easy option for anyone who wants to make DIY projects with wood but doesn’t own a saw. Once the wood pieces are cut, brush stain on all the pieces of wood. Let it dry and cover any sides you missed.
-
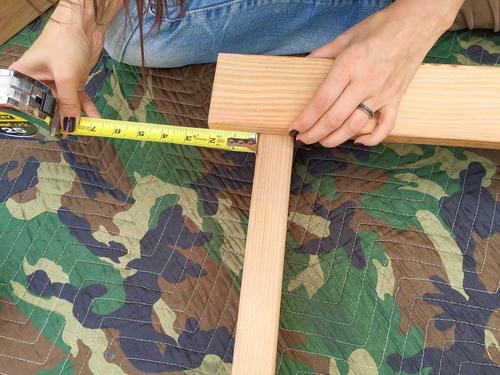
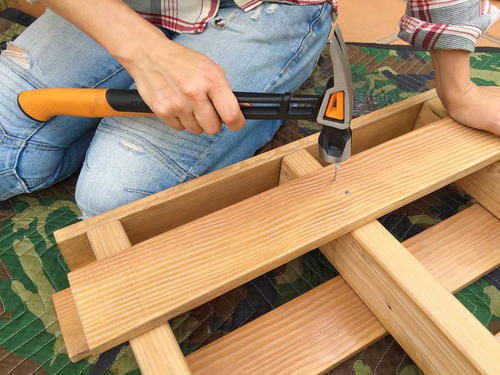
Next, lay out the three 15” 2”x4” boards vertically, with 8 ¾” between them. The boards should be lying on their skinny side with the best looking side of the stained boards facing the front. Lay the first 26 1/4" board on top with a 2” reveal on either side. Nail this board on flush with the top of the 2”x4” boards to create a strong piece.
-
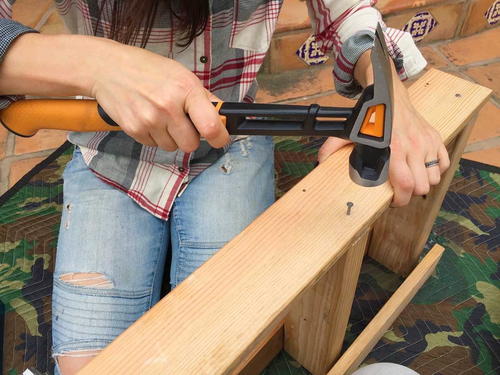
One at a time, nail the other two 26” 1”x4” boards horizontally across the back of the 2”x4” boards. The top and bottom boards should be flush with the ends of the 15" 2"x4"s. The last board goes across the middle, spaced evenly with 2 1/4" between boards.
-
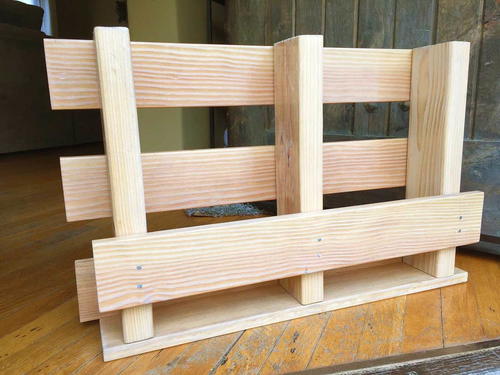
Nail one of the shorter 24” 1”x4”s onto the bottom of the 2”x4” boards to create the base. This will stick out about an inch on either side, which creates a nice reveal to add character to the shape.
-
Hammer the other 24” board onto the front, leaving a 2” gap from the bottom of the 2”x4”s. This board will keep your wine bottles from falling out of the rack.
-
The main structure of the rack now exists and you could stop there, but it’s really simple to create a frame for a few wine glasses to hang below the piece.
-
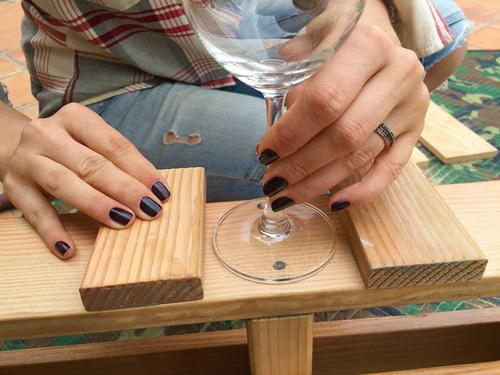
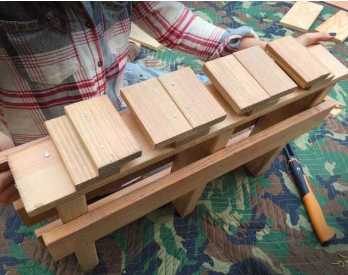
Wine glasses hang well upside down, and this also keeps them dust free. To create a space for the foot of the wine glass to slide into, flip the rack upside down and place the small boards on the bottom. Repeat steps 7 and 8 until you have created spots for three glasses.
-
Wine glasses hang well upside down, and this also keeps them dust free. To create a space for the foot of the wine glass to slide into, flip the rack upside down and place the small boards on the bottom. Repeat steps 7 and 8 until you have created spots for three glasses.
-
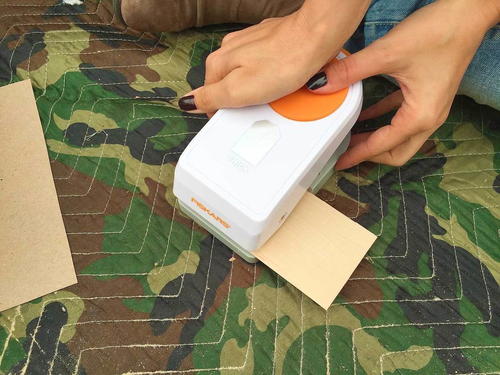
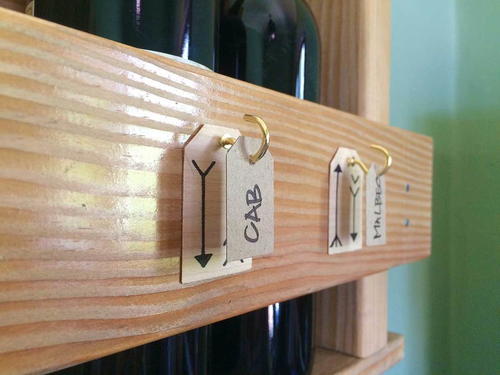
Since this rack, while saving space, blocks the labels on the bottle, it helps to have a tag for each bottle so that at a glance you know the type of wine you are serving. To create the wine bottle tags, use the Large Thick Materials Tag punch to punch out four tags from adhesive backed wood veneer. This punch quickly and easily cuts shapes from obscure and thick materials.
-
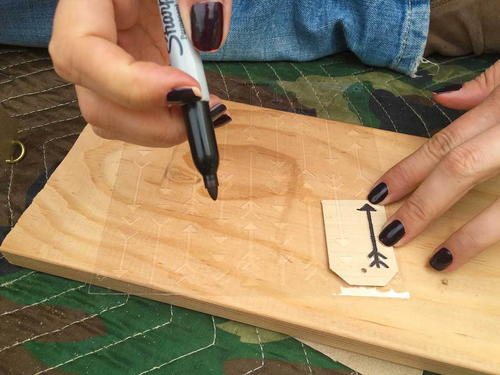
Use the Native Arrows Decorative Stencil Set and a permanent marker to draw arrows on the wood veneer tags. Peel off the back and stick the tags onto the front of the wine rack. This will allow the frame to look finished even if a wine bottle spot is empty.
-
Create tags from cardboard using the Medium Thick Materials for each wine bottle. Write the name of the wine on the small cardboard tag.
-
Twist the small hooks into the top of the wood veneer tags. Hang the smaller, cardboard tags from the hooks.
-
Display your wine bottles and wine glasses. Relish the thrill of creating your own storage pieces that have your handiwork, style and character. Pop a cork and enjoy!
Read NextEasy $9 DIY Side Table
Your Recently Viewed Projects
Thanks for your comment. Don't forget to share!
Report Inappropriate Comment
Are you sure you would like to report this comment? It will be flagged for our moderators to take action.
Thank you for taking the time to improve the content on our site.