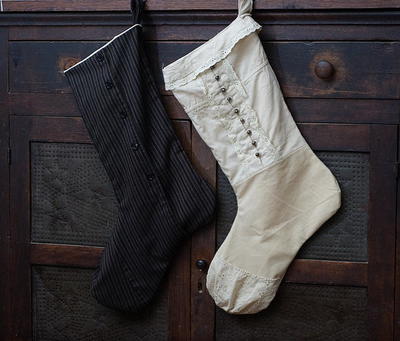
Upcycled Christmas Stockings

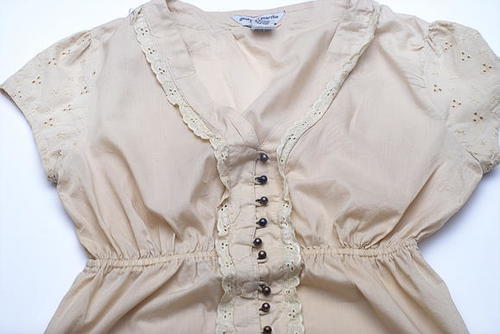
Do you have old clothing that is in need of an upcycle? These upcycled Christmas stockings make use of old articles of clothing in your house to create personalized, Christmas decorations. You'll love the look of these hand-sewn stockings that will add character to your mantel this holiday season. These stockings will last years to come and are much cheaper than buying stockings at the store. Your new favorite holiday tradition will be taking out your DIY Christmas stockings and hanging them above the fireplace.
Estimated CostUnder $10
Time to CompleteIn an evening
Primary TechniqueSewing

SeasonWinter
HolidayChristmas
Project TypeMake a Project
Materials List
- Variety of clothing
- Thread
- Material for lining stockings
- Pattern for stocking
- Dressmaker Shears (9")
Instructions:
-
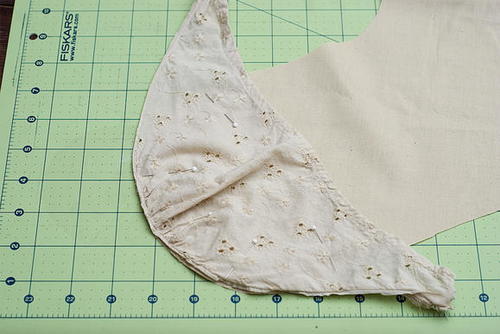
Tape together 4 sheets of 8.5 x 11 inch paper and draw a stocking pattern or you can print one from online. When using clothing, the pattern is simply placed on top of the article of clothing, pinned in place, and cut out. There is no worry about getting the layers of material facing the right direction.
-
Some articles of clothing may need to be altered to make them large enough or flat enough to work with. For example removing the elastic gathering from the waist of the ruffled shirt.
-
After cutting out the stocking, remove one of the eyelet cap sleeves from the shirt and used it on the toe of the stocking. It was not only a nice embellishment, but it also tied back in with the top of the stocking.
-
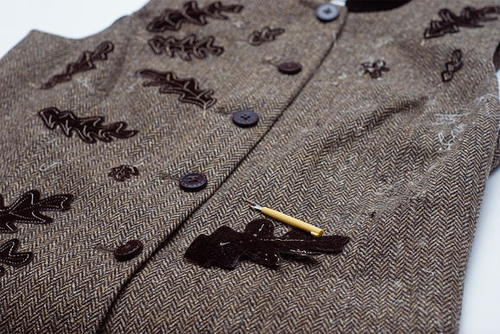
When working with a vest, use the seam ripper from the Fiskars Sew Taxi to remove the leaves.
-
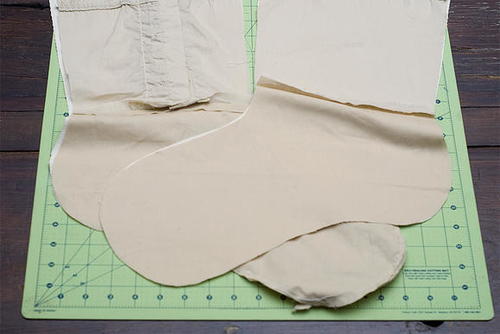
The steps to this point are simply to choose a pattern, prepare your fabric to make it useable with your pattern, pin the pattern to the fabric and cut it out.
-
Next, use the pattern to cut out 2 pieces for the lining. If you are not using a purchased pattern that includes instructions, the fabric for the lining should be folded so the right sides are together.
-
Pin the outside front of the stocking to one of the lining pieces, right sides together, stitch along the top edge, and press the seam open. Repeat this with the back of the stocking and other lining piece. When placed side by side with the outside panels facing up, you should have 2 stockings with toes that face in opposite directions.
-
Open the 2 stocking panels up and place the right sides together. Stitch around the perimeter of the stocking, starting and stopping on the lining, and leaving an opening for turning. Clip the seam allowance along the curves to reduce bulk and bunching of the materials. Turn the stocking right side out and stitch the opening closed.
-
Add a length of ribbon, fabric, or other material to the top of the stocking to use for hanging it. Embellish the stocking as desired.


Read Next11 Old T-Shirt Craft Ideas